I just made Quick Pickled Garlic that’s so good I’m hiding jars from friends and honestly want one on every plate.
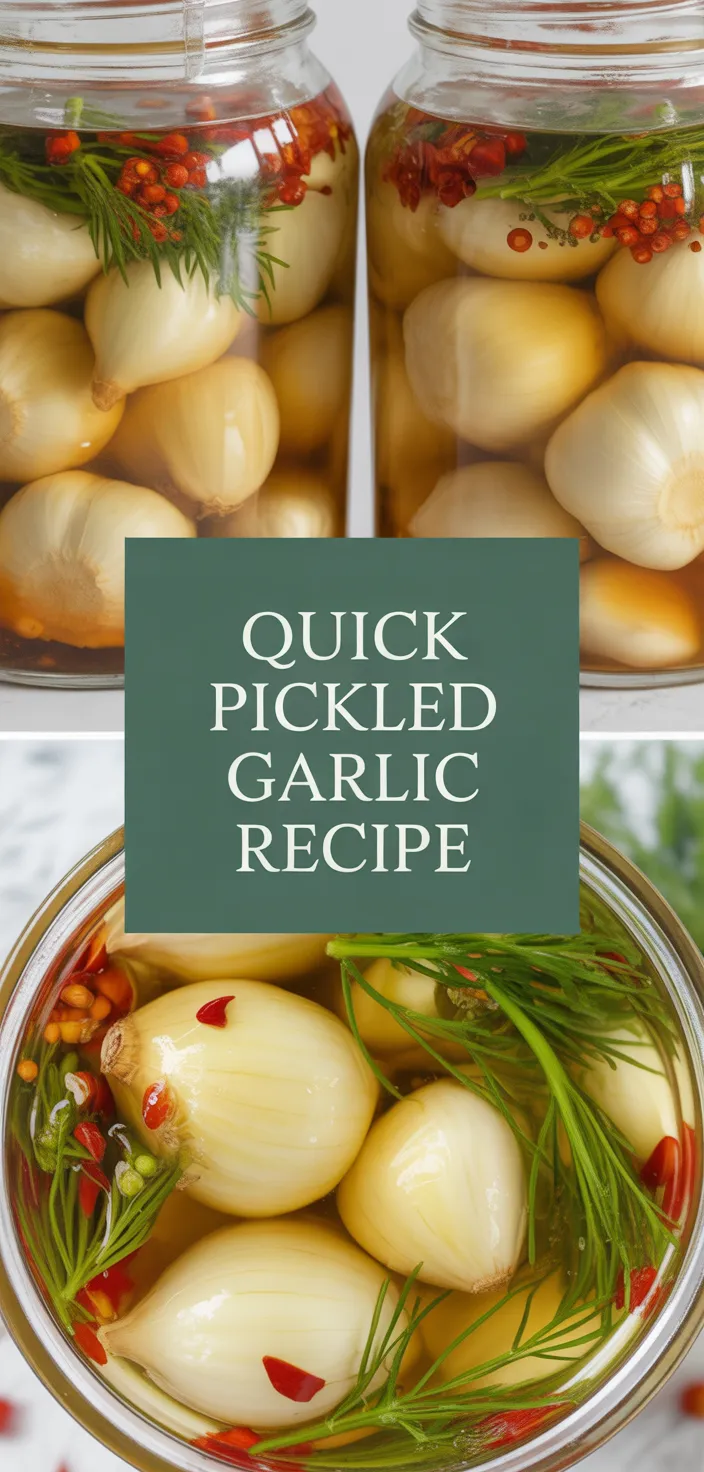
I’m obsessed with Quick Pickled Garlic because it’s punchy, crunchy, and stupidly addictive. I keep a jar in the Pickled Garlic Refrigerator at all times so I can grab a garlicky hit for salads, toast, or straight-up snacking.
I love that garlic cloves, peeled, soak up sharp white vinegar and turn into these bold little bulbs that cut through fatty food and bright up boring meals. It’s messy, unapologetic flavor that makes me reach for more.
No fuss. Big garlic power in a jar.
Once you start popping them, you won’t stop. And I mean every single really tasty bite.
Ingredients
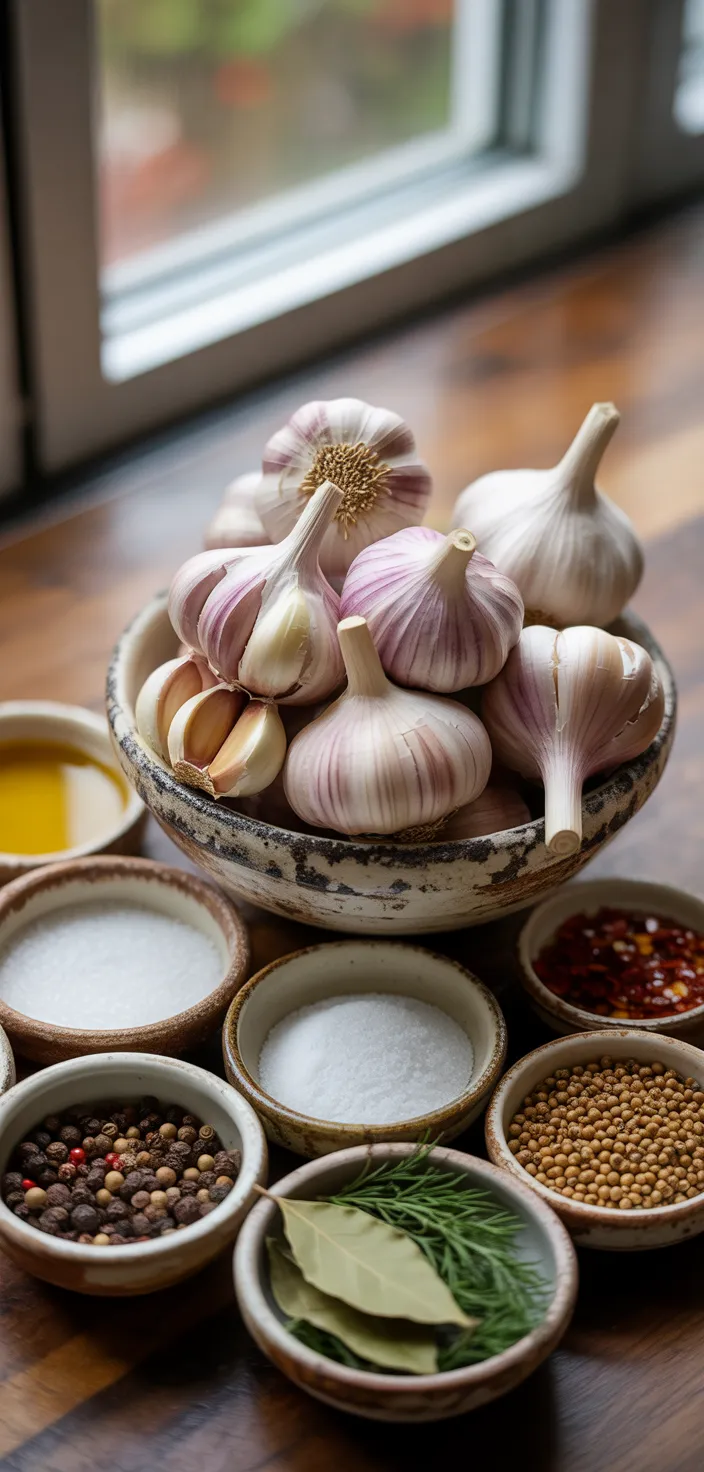
- Garlic cloves: crunchy, garlicky punch; keep a bit of skin if you want faster prep.
- White or apple cider vinegar: tangy pickling bite that keeps garlic crisp and zippy.
- Water: mellows the vinegar so it’s not face-puckering, keeps jar balanced.
- Sugar: softens sharpness and gives a slight sweet counterpoint to the tang.
- Kosher salt: brings out garlic’s flavor and helps preserve that satisfying snap.
- Black peppercorns: little pops of heat and earthiness when you bite in.
- Coriander seeds: citrusy, warm notes; optional but nice for depth.
- Mustard seeds: crunchy peppery pops; optional if you like extra texture.
- Red pepper flakes: brings slow-building heat; optional if you want a kick.
- Bay leaves: subtle herbal backbone that keeps things tasting rounded.
- Dill: fresh, slightly grassy lift; use fresh sprigs if you have them.
- Thyme or rosemary: woody herbal touch, use sparingly so it doesn’t dominate.
- Sterilized jar(s): keeps garlic safe and shelf-stable; bits of brine make it homey.
Ingredient Quantities
- 1 lb (450 g) garlic cloves, peeled (you can leave a bit of skin on if you wanna save time)
- 1 cup (240 ml) white vinegar or apple cider vinegar
- 1 cup (240 ml) water
- 2 tbsp (25 g) granulated sugar
- 1 tbsp (18 g) kosher salt
- 1 tsp whole black peppercorns
- 1 tsp coriander seeds (optional)
- 1 tsp mustard seeds (optional)
- 1/2 tsp red pepper flakes (optional, for heat)
- 2 bay leaves
- 2 sprigs fresh dill or 1 tsp dried dill (optional)
- 1 to 2 sprigs fresh thyme or rosemary (optional)
- 1 pint / 500 ml sterilized jar(s) with lids, or jars enough to hold the garlic
How to Make this
1. Peel the garlic cloves, leaving a bit of papery skin on some if you want to save time, and pack them into your sterilized pint jar(s) leaving about 1/2 inch headspace.
2. In a small saucepan combine the vinegar, water, sugar and kosher salt; stir and bring just to a simmer over medium heat until sugar and salt dissolve.
3. Add the whole black peppercorns, coriander seeds, mustard seeds, red pepper flakes, and bay leaves to the hot brine, give it a quick stir and let it simmer 1 minute to bloom the spices.
4. Tuck the fresh dill and the sprig(s) of thyme or rosemary into the jar(s) around the garlic so the herbs stay distributed.
5. Pour the hot brine straight over the garlic and herbs, pressing down with a spoon so the garlic is fully submerged; leave about 1/4 inch headspace.
6. Wipe the jar rims clean, seal with lids, and let the jars cool on the counter until they reach room temp; you can gently tilt the jar to dislodge any trapped air bubbles.
7. Once cool, transfer the jars to the refrigerator; these are quick pickles so do not water bath can unless you follow canning rules for acidity and processing.
8. Wait at least 48 hours for decent flavor, but honestly they taste best after 5 to 7 days; the longer they sit the mellower and less sharp the garlic gets.
9. Store in the fridge for up to 2 to 3 months, always use a clean fork to remove garlic; if you see cloudiness, off smells, or mold toss it.
10. Quick tips: bruise a few cloves slightly to let brine penetrate faster, use apple cider vinegar for a sweeter earthier note, and if you want fizz add a tiny pinch of sugar less on second batch if it tasted too sweet.
Equipment Needed
1. Cutting board
2. Paring knife (for peeling and bruising cloves)
3. Measuring cups and spoons
4. Small saucepan
5. Wooden spoon or heatproof spatula
6. Pint jars with lids (sterilized) and a funnel for easy filling
7. Spoon or chopstick to press garlic down and release air bubbles
8. Jar lifter or tongs (if jars are hot)
9. Labels and a marker (date the jars)
FAQ
Quick Pickled Garlic Recipe Substitutions and Variations
- Garlic cloves: you can use peeled pre-packaged garlic to save time, or halve whole small bulbs if you want bigger pieces, or use roasted garlic for a sweeter, milder pickled bite.
- White or apple cider vinegar: swap in rice vinegar for a milder, slightly sweet flavor, white wine vinegar for a fruitier note, or lemon juice (use fresh, same volume) for bright acidity.
- Granulated sugar: substitute honey or maple syrup for a more complex sweetness (use a touch less by volume), or use agave for a neutral liquid sweetener.
- Kosher salt: use sea salt at the same amount, or table salt but cut the amount to about 3/4 the recipe amount because it is finer and saltier; if you want lower sodium, use a low sodium salt blend but taste and adjust.
Pro Tips
1) Warm brine, cold jar trick. Pour the brine while it’s hot but make sure jars aren’t freezing cold or they might crack. Hot brine speeds flavor into the garlic way faster, but let the jars sit on the counter a few minutes if they feel icy.
2) Speed the mellowing. Smash a few cloves lightly or slice 1 or 2 so the brine can get in quicker. If you want less bite right away, remove the green sprout from large cloves or briefly blanch peeled cloves 10–20 seconds in boiling water, then cool before packing.
3) Layer flavors, not chaos. Put whole spices and herbs near the sides so each jar gets a mix, and use smaller amounts of strong herbs like rosemary at first. If your first batch was too sweet or too peppery, halve that ingredient next time and keep notes on the jar.
4) Safety and storage: these are refrigerator quick pickles not shelf stable unless you follow proper canning rules. Always use clean utensils, watch for cloudiness, off smells or mold, and eat within 2 to 3 months. If you notice fizzing or a yeasty smell toss it.
Quick Pickled Garlic Recipe
My favorite Quick Pickled Garlic Recipe
Equipment Needed:
1. Cutting board
2. Paring knife (for peeling and bruising cloves)
3. Measuring cups and spoons
4. Small saucepan
5. Wooden spoon or heatproof spatula
6. Pint jars with lids (sterilized) and a funnel for easy filling
7. Spoon or chopstick to press garlic down and release air bubbles
8. Jar lifter or tongs (if jars are hot)
9. Labels and a marker (date the jars)
Ingredients:
- 1 lb (450 g) garlic cloves, peeled (you can leave a bit of skin on if you wanna save time)
- 1 cup (240 ml) white vinegar or apple cider vinegar
- 1 cup (240 ml) water
- 2 tbsp (25 g) granulated sugar
- 1 tbsp (18 g) kosher salt
- 1 tsp whole black peppercorns
- 1 tsp coriander seeds (optional)
- 1 tsp mustard seeds (optional)
- 1/2 tsp red pepper flakes (optional, for heat)
- 2 bay leaves
- 2 sprigs fresh dill or 1 tsp dried dill (optional)
- 1 to 2 sprigs fresh thyme or rosemary (optional)
- 1 pint / 500 ml sterilized jar(s) with lids, or jars enough to hold the garlic
Instructions:
1. Peel the garlic cloves, leaving a bit of papery skin on some if you want to save time, and pack them into your sterilized pint jar(s) leaving about 1/2 inch headspace.
2. In a small saucepan combine the vinegar, water, sugar and kosher salt; stir and bring just to a simmer over medium heat until sugar and salt dissolve.
3. Add the whole black peppercorns, coriander seeds, mustard seeds, red pepper flakes, and bay leaves to the hot brine, give it a quick stir and let it simmer 1 minute to bloom the spices.
4. Tuck the fresh dill and the sprig(s) of thyme or rosemary into the jar(s) around the garlic so the herbs stay distributed.
5. Pour the hot brine straight over the garlic and herbs, pressing down with a spoon so the garlic is fully submerged; leave about 1/4 inch headspace.
6. Wipe the jar rims clean, seal with lids, and let the jars cool on the counter until they reach room temp; you can gently tilt the jar to dislodge any trapped air bubbles.
7. Once cool, transfer the jars to the refrigerator; these are quick pickles so do not water bath can unless you follow canning rules for acidity and processing.
8. Wait at least 48 hours for decent flavor, but honestly they taste best after 5 to 7 days; the longer they sit the mellower and less sharp the garlic gets.
9. Store in the fridge for up to 2 to 3 months, always use a clean fork to remove garlic; if you see cloudiness, off smells, or mold toss it.
10. Quick tips: bruise a few cloves slightly to let brine penetrate faster, use apple cider vinegar for a sweeter earthier note, and if you want fizz add a tiny pinch of sugar less on second batch if it tasted too sweet.