
I finally learned how to Make Your Own Yogurt that’s thicker than store-bought, cheaper, and so ridiculously simple you’ll keep scrolling for the recipe.
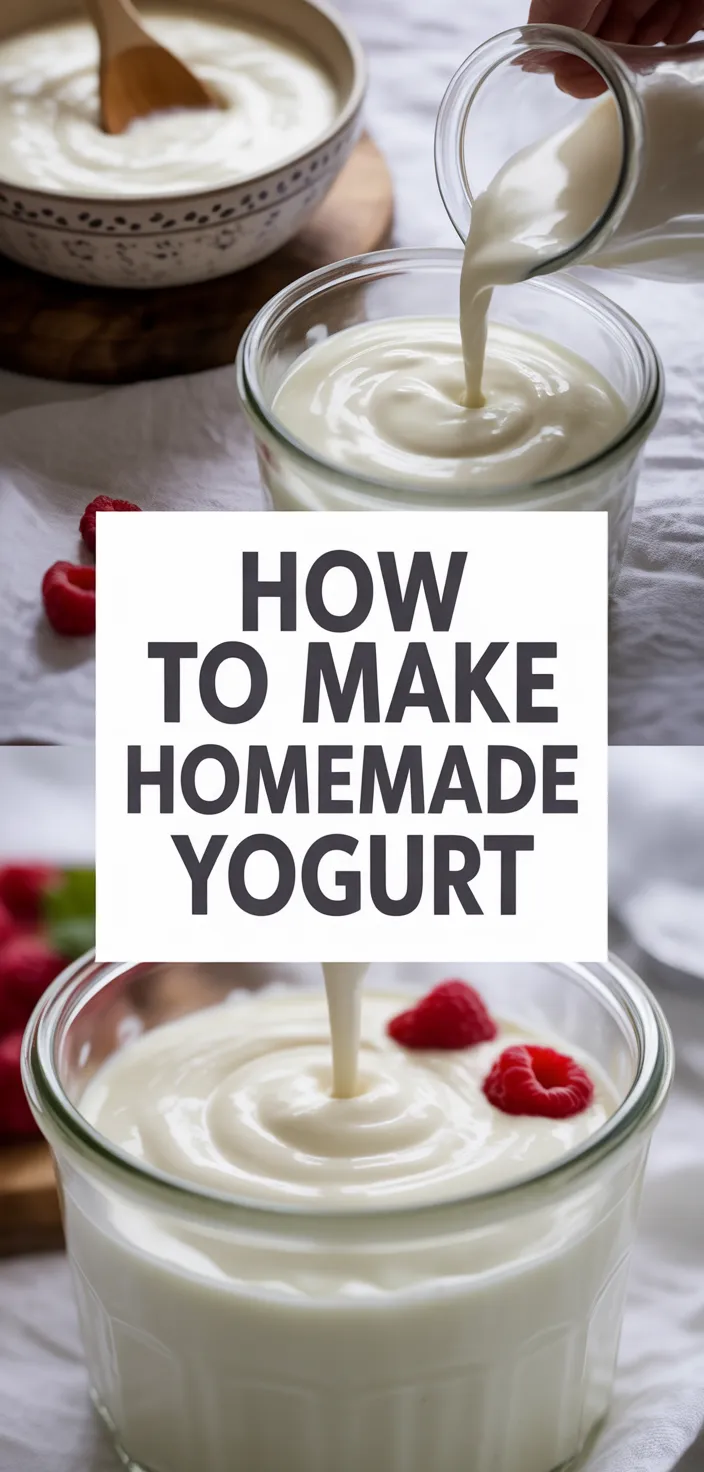
And I’m weirdly obsessed with Homemade Yogurt. I love the thick tang, the way a spoon drags slowly through cream that started as simple milk.
I don’t care about gadgets, I want this in my fridge. Making Yogurt feels almost like magic, except it’s just real bacterial work and patience.
I keep 1 quart whole milk and a bit of plain yogurt with live active cultures on standby. I eat it plain, I spoon it over fruit, I use it in sauces.
It’s stubbornly simple and wildly satisfying. That’s the point.
I can’t get enough. Not even close.
Seriously now.
Ingredients
- Basically, creamy base that makes yogurt rich and silky; real protein, no skim.
- Plus, live cultures kick fermentation; gives tang and gut friendly probiotics.
- Powdered milk thickens texture, makes it creamier, like shop-bought.
- Basically, a touch of sweet that feeds cultures and softens tartness.
Ingredient Quantities
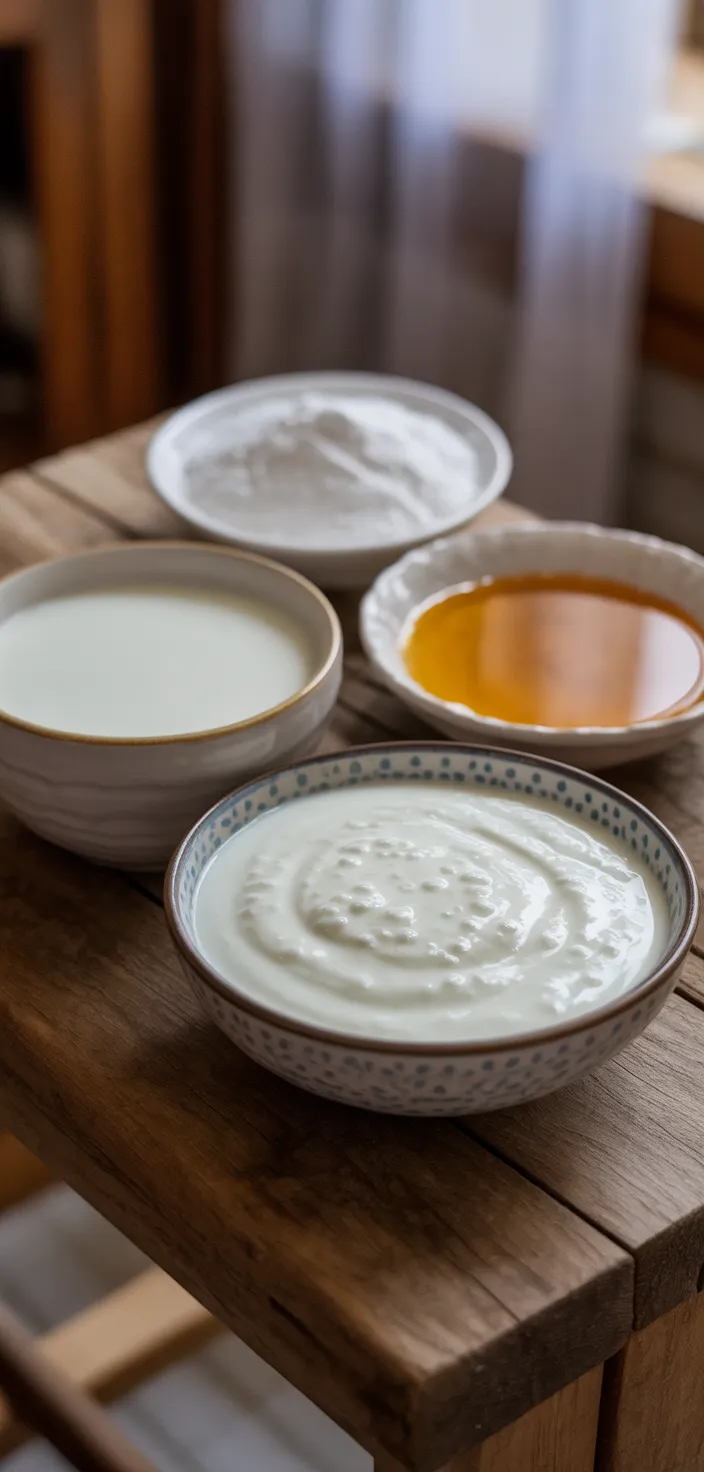
- 1 quart whole milk (4 cups / about 946 ml), preferably pasteurized not ultra pasteurized
- 2 tablespoons plain yogurt with live active cultures (store bought or from a previous batch) to use as the starter
- 2 tablespoons powdered milk (optional, for a thicker, creamier set)
- 1 tablespoon sugar or honey (optional, helps feed the culture and adds a touch of sweetness)
How to Make this
1. Pour 1 quart (4 cups) whole milk into a heavy pot and add 2 tablespoons powdered milk if you want thicker creamier yogurt; stir to dissolve the powder.
2. Heat the milk slowly over medium, stirring now and then so it doesn’t scorch, until it reaches about 180°F (82°C) or it starts to steam and small bubbles form around the edge.
3. Remove pot from heat and let the milk cool to about 110°F (43°C). If you don’t have a thermometer, cool until it’s warm to the touch but not hot, like a warm bath.
4. In a small bowl mix 2 tablespoons plain yogurt with live active cultures with a few tablespoons of the warm milk until smooth, then whisk that back into the rest of the milk. If you want a touch of sweetness, stir in 1 tablespoon sugar or honey now so it dissolves.
5. Pour the milk into a clean jar or jars and cover them with lids or a clean towel. Cleanliness matters, so make sure everything that touches the milk is well rinsed or washed.
6. Keep the milk at a steady warm temperature around 100–110°F (38–43°C) for 6 to 12 hours to let the cultures work. Good ways are: oven with just the light on, wrapped in towels in a cooler, in a warm spot on top of a warm appliance, or using a heating pad set low under a towel. Check after 6 hours; longer gives tangier thicker yogurt.
7. When it looks set and slightly jiggly and has a tangy aroma, move it to the fridge to cool for at least 4 hours. Cooling firms it up and stops the cultures.
8. Optional: for Greek style, line a sieve with cheesecloth and drain yogurt in the fridge for 1 to 4 hours until it reaches desired thickness.
9. Save 2 tablespoons of your finished yogurt as a starter for the next batch. Use fresh pasteurized (not ultra pasteurized) milk and the saved starter within 1 week, or freeze starter in small portions.
10. Taste and tweak next time: more incubation time = tangier yogurt, powdered milk or draining = thicker, full fat milk = creamier. Don’t stir too much while incubating or you might get a runnier set.
Equipment Needed
1. Heavy-bottomed pot (3 to 4 quart)
2. Instant-read thermometer or candy thermometer
3. Whisk
4. Measuring cups and spoons
5. Small mixing bowl and spoon (for tempering starter)
6. Heatproof ladle or pour spout jug
7. Clean glass jars with lids (or one large jar)
8. Cheesecloth or fine mesh sieve (for Greek style)
9. Thick kitchen towels or an insulating cooler for incubating
10. Oven mitts or potholders
FAQ
How To Make Homemade Yogurt Recipe Substitutions and Variations
How To Make Homemade Yogurt
This yogurt is creamy, simple, and way better than most store brands. It takes a little patience more than skill. Here’s how to do it.
Ingredients
– 1 quart whole milk (4 cups / about 946 ml), preferably pasteurized not ultra pasteurized
– 2 tablespoons plain yogurt with live active cultures (store bought or from a previous batch) to use as the starter
– 2 tablespoons powdered milk (optional, for a thicker, creamier set)
– 1 tablespoon sugar or honey (optional, helps feed the culture and adds a touch of sweetness)
Steps
1. Heat the milk. Pour the milk into a heavy pot and slowly warm it over medium heat until it reaches about 180°F (82°C). You’ll see tiny bubbles at the edges and it will look steamy. Stir a few times so it doesn’t scorch. Heating helps change the proteins so the yogurt sets better.
2. Cool to inoculation temp. Remove from heat and let the milk cool to about 110 to 115°F (43 to 46°C). You can speed this by placing the pot in a cool water bath. It should feel warm but not hot to the touch.
3. Mix starter. Put the 2 tablespoons of yogurt in a small bowl and whisk in a cup of the warm milk until smooth. Then stir that back into the rest of the milk. If you’re using powdered milk, whisk it into the milk before heating or into the warm milk now so it dissolves. If using sugar or honey, stir it in here.
4. Incubate. Pour the milk into jars or keep it in the pot. Keep it warm and steady at about 105 to 115°F (40 to 46°C) for 6 to 12 hours depending on how tangy you want it. Shorter time = milder yogurt, longer = tangier and thicker. Ways to keep it warm: oven with the light on, a warm spot in your house, a cooler with hot water bottles, a slow cooker on the warm setting, or a dedicated yogurt maker.
5. Chill and set. When it looks set and tastes right, move it to the fridge for at least 4 hours to fully firm up. It will thicken as it cools. After chilling you can stir it smooth or leave it spoonable with a slight gel.
6. Store. Keeps for about 1 to 2 weeks in the fridge. Save 2 tablespoons as the starter for your next batch.
Tips, tricks and hacks
– Use pasteurized milk that is not ultra pasteurized. Ultra pasteurized milks often fail to set right.
– If you want Greek style yogurt, strain the finished yogurt through cheesecloth for 2 to 4 hours to remove whey.
– For a thicker set without powdered milk, add a few tablespoons of heavy cream to the milk before heating.
– If you don’t have a thermometer, heat until it’s steaming and bubbles form at the edge, then cool until the pot feels warm on the outside, not hot.
– Longer incubation ups the tang and reduces sweetness, so taste after 6 hours and decide.
– Always use a clean spoon and clean jars. Contamination can give off flavors or prevent proper setting.
Substitutions
- Whole milk -> 2% milk plus 2 to 4 tablespoons heavy cream for similar fat and creaminess
- Plain yogurt starter -> freeze dried yogurt cultures or a mix of 1 to 2 probiotic capsules with live strains (check labels for lactobacillus/bifidobacterium)
- Powdered milk -> skip it and instead add 2 to 4 tablespoons heavy cream for richness (less thicken but creamier)
- Sugar or honey -> maple syrup or agave, or omit entirely for plain unsweetened yogurt
Final note
This is forgiving. Expect small variations from batch to batch. Keep a little of each batch as your starter and you can make yogurt for months. Enjoy it with fruit, granola, or straight from the jar.
Pro Tips
1) Warm the starter first. Mix the 2 tbsp yogurt with a few tablespoons of warm milk until totally smooth before adding it back. If the milk is even slightly too hot it can kill the cultures, and if it is too cool it will take forever to set. Aim for about body-warm.
2) Keep the temp steady, not hotter. Fluctuating temps make loose or grainy yogurt. Use an oven with the light on, a yogurt maker, or wrap jars in towels on a heating pad set low. If you can, check with a cheap instant-read thermometer once just to know what your setup usually runs.
3) For thicker creamier results use powdered milk or drain it. Adding 2 tbsp powdered milk per quart or straining in cheesecloth after chilling will firm it up without changing flavor much. Also longer incubation = tangier, shorter = milder, so tweak time not ingredients if you want less bite.
4) Dont stir while it incubates and keep everything clean. Moving the milk makes it runny and introduces stray microbes. Save 2 tbsp from a perfectly set batch for your next starter, but toss it after a week or freeze in small portions to avoid weakening strains.
How To Make Homemade Yogurt Recipe
My favorite How To Make Homemade Yogurt Recipe
Equipment Needed:
1. Heavy-bottomed pot (3 to 4 quart)
2. Instant-read thermometer or candy thermometer
3. Whisk
4. Measuring cups and spoons
5. Small mixing bowl and spoon (for tempering starter)
6. Heatproof ladle or pour spout jug
7. Clean glass jars with lids (or one large jar)
8. Cheesecloth or fine mesh sieve (for Greek style)
9. Thick kitchen towels or an insulating cooler for incubating
10. Oven mitts or potholders
Ingredients:
- 1 quart whole milk (4 cups / about 946 ml), preferably pasteurized not ultra pasteurized
- 2 tablespoons plain yogurt with live active cultures (store bought or from a previous batch) to use as the starter
- 2 tablespoons powdered milk (optional, for a thicker, creamier set)
- 1 tablespoon sugar or honey (optional, helps feed the culture and adds a touch of sweetness)
Instructions:
1. Pour 1 quart (4 cups) whole milk into a heavy pot and add 2 tablespoons powdered milk if you want thicker creamier yogurt; stir to dissolve the powder.
2. Heat the milk slowly over medium, stirring now and then so it doesn’t scorch, until it reaches about 180°F (82°C) or it starts to steam and small bubbles form around the edge.
3. Remove pot from heat and let the milk cool to about 110°F (43°C). If you don’t have a thermometer, cool until it’s warm to the touch but not hot, like a warm bath.
4. In a small bowl mix 2 tablespoons plain yogurt with live active cultures with a few tablespoons of the warm milk until smooth, then whisk that back into the rest of the milk. If you want a touch of sweetness, stir in 1 tablespoon sugar or honey now so it dissolves.
5. Pour the milk into a clean jar or jars and cover them with lids or a clean towel. Cleanliness matters, so make sure everything that touches the milk is well rinsed or washed.
6. Keep the milk at a steady warm temperature around 100–110°F (38–43°C) for 6 to 12 hours to let the cultures work. Good ways are: oven with just the light on, wrapped in towels in a cooler, in a warm spot on top of a warm appliance, or using a heating pad set low under a towel. Check after 6 hours; longer gives tangier thicker yogurt.
7. When it looks set and slightly jiggly and has a tangy aroma, move it to the fridge to cool for at least 4 hours. Cooling firms it up and stops the cultures.
8. Optional: for Greek style, line a sieve with cheesecloth and drain yogurt in the fridge for 1 to 4 hours until it reaches desired thickness.
9. Save 2 tablespoons of your finished yogurt as a starter for the next batch. Use fresh pasteurized (not ultra pasteurized) milk and the saved starter within 1 week, or freeze starter in small portions.
10. Taste and tweak next time: more incubation time = tangier yogurt, powdered milk or draining = thicker, full fat milk = creamier. Don’t stir too much while incubating or you might get a runnier set.