
I share an easy method for Yogurt From Scratch that uses everyday ingredients and hinges on one little-known timing detail you won’t expect.
I never guessed whole milk could become something tangy and thick in my own kitchen, but here I am, hooked. I started with a bit of plain yogurt with live active cultures as a stubborn little starter, then let time and a little patience do the rest.
There is a tiny moment where curiosity jumps in, when you strain the set yogurt and it turns into Strained Greek Yogurt that holds up on a spoon. Making Yogurt From Scratch felt oddly rebellious, like you beat the factory at its own game.
It’s messy, rewarding, and I promise you’ll keep testing tweaks.
Ingredients
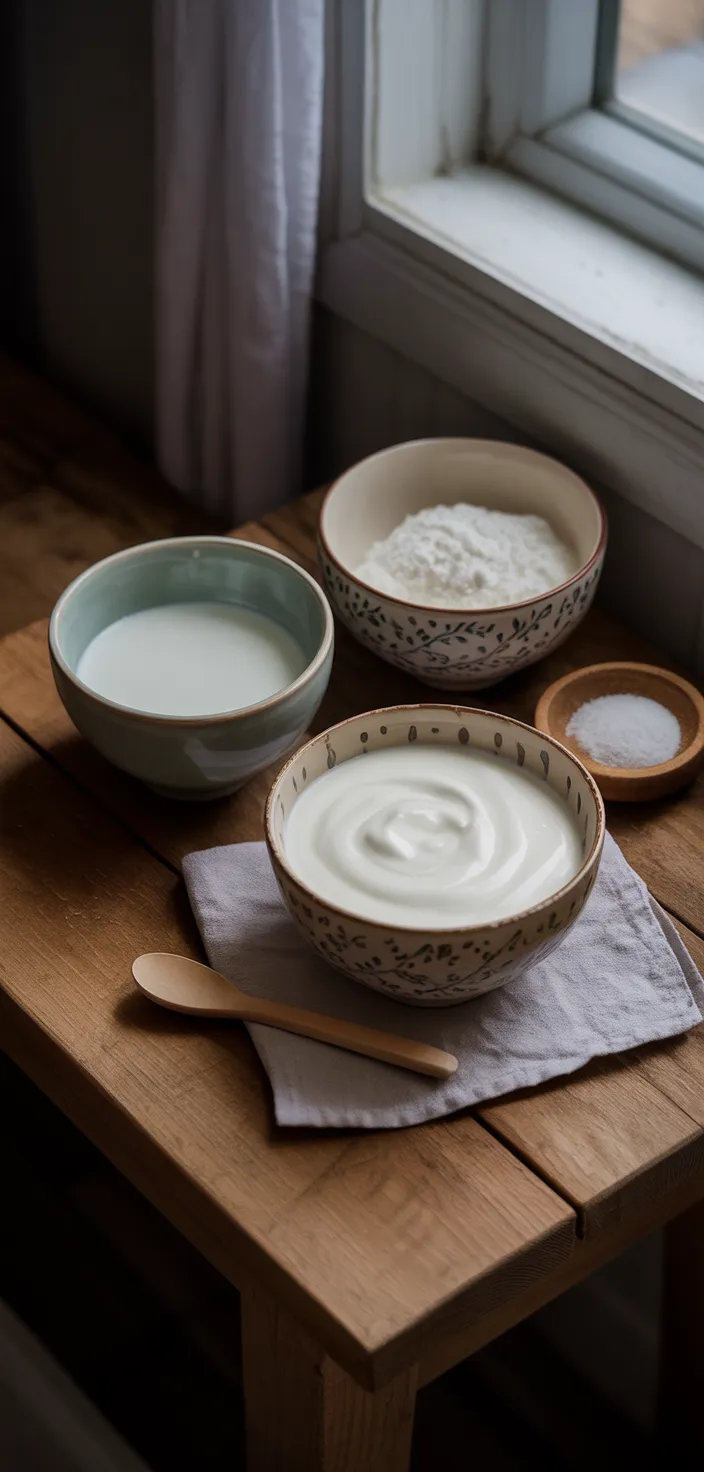
- Whole milk gives rich, creamy texture, it’s higher fat and has good protein.
- Plain yogurt starter supplies live probiotics that ferment milk, adding tang and gut benefits.
- Nonfat dry milk helps thicken boosts protein makes Greek style texture without extra fat.
- Pinch of fine salt brightens flavors balances acidity and makes yogurt taste less flat.
- Honey or maple syrup add natural sweetness extra carbs and floral flavor notes.
- Vanilla extract gives warm aroma mostly flavor not sweetness and smells amazing.
Ingredient Quantities
- 1 quart (4 cups) whole milk, preferably not ultra-pasteurized, it’s richer and makes creamier yogurt
- 2 heaping tablespoons plain yogurt with live active cultures, store-bought or from a previous batch
- 1/4 to 1/3 cup nonfat dry milk powder, optional, for a thicker creamier Greek texture
- Pinch of fine salt, optional, to brighten the flavor
- Optional sweetener: 1 to 2 tablespoons honey or maple syrup, or 1 teaspoon vanilla extract, if you want it flavored
How to Make this
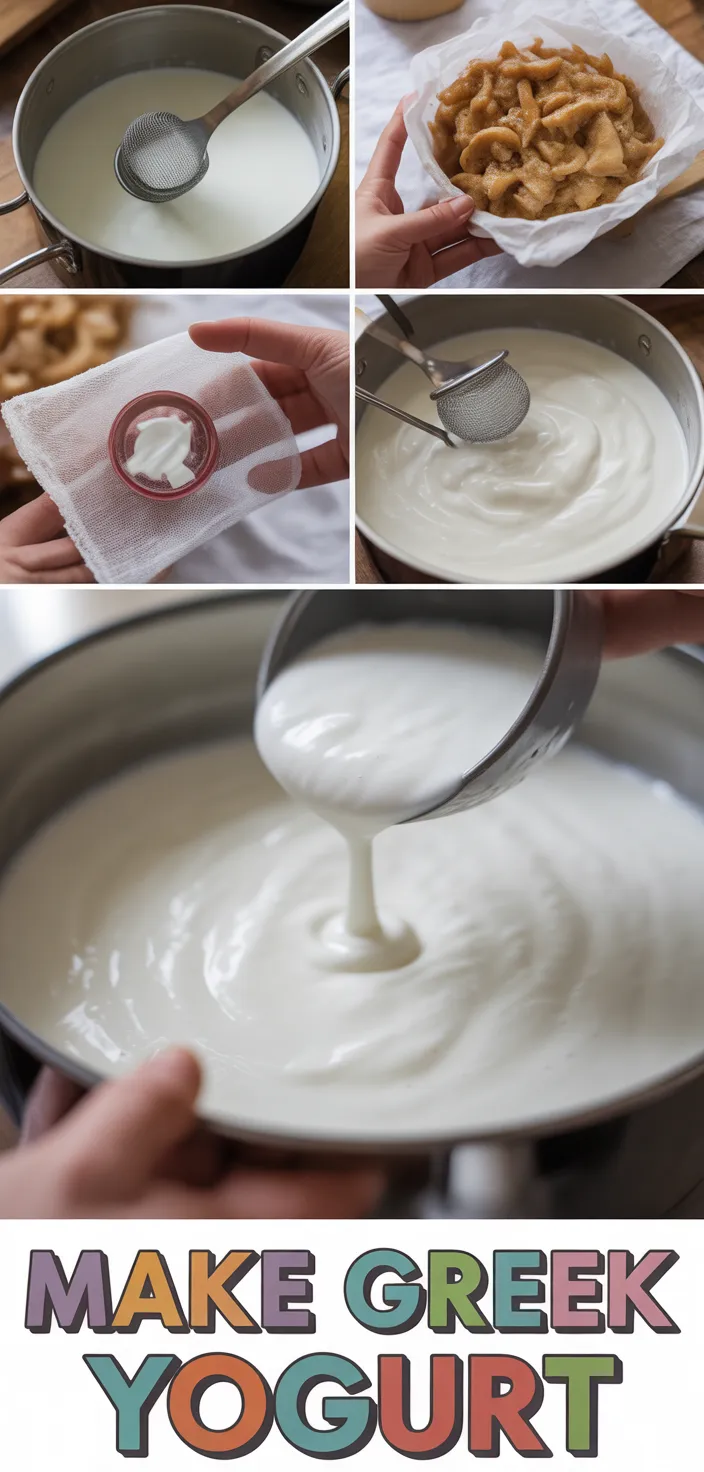
1. Pour 1 quart whole milk into a heavy saucepan, whisk in 1/4 to 1/3 cup nonfat dry milk powder if you want thicker creamier Greek yogurt, and slowly heat to about 180 degrees F while stirring occasionally so it doesnt scorch or form a big skin.
2. Remove from heat and let the milk cool to about 110 to 115 degrees F; use a thermometer if you got one, if not it should feel warm on your wrist like a hot bath but not burning.
3. Scoop 2 heaping tablespoons plain yogurt with live active cultures into a small bowl, temper it with a few tablespoons of the warm milk so it relaxes, then whisk that back into the pot of milk until combined.
4. Pour the milk into a clean container or jars, cover loosely with lid or a towel and keep it warm and undisturbed for 6 to 12 hours until it sets — longer gives tangier thicker yogurt; good warm methods are an oven with the light on, an insulated cooler with warm water, or a yogurt maker.
5. When it looks set and jiggly, put it in the fridge for a couple hours to chill and firm up; chilling also helps separate whey when you strain.
6. Line a fine mesh sieve with cheesecloth, coffee filter or a clean kitchen towel, set it over a bowl and pour the yogurt in to strain for 2 to 4 hours or overnight for very thick Greek texture; save the whey for baking or smoothies, dont throw it away.
7. Transfer strained yogurt to a container and stir to desired consistency; add a pinch of fine salt to brighten the flavor, and sweeten if you like with 1 to 2 tablespoons honey or maple syrup or 1 teaspoon vanilla extract — you can mix these in now.
8. Keep about 2 tablespoons of this batch as starter for your next batch if you want, store the yogurt in the fridge and use clean spoons so it lasts longer.
9. Quick tips and hacks: use milk that is preferably not ultra pasteurized for a creamier result, adding more dry milk powder makes it thicker without extra straining, dont over stir or youll knock out the cultures, and if your yogurt is too tart shorten the incubation next time or pick a milder store bought starter.
Equipment Needed
1. Heavy bottomed saucepan (at least 1 quart)
2. Instant read thermometer
3. Whisk
4. Small bowl for tempering the starter
5. Measuring cups and measuring spoons
6. Clean jars or container with lids or a towel for covering
7. Fine mesh sieve
8. Cheesecloth, coffee filter, or a clean kitchen towel for lining the sieve
9. Large bowl to catch whey and a ladle or large spoon for transferring
FAQ
How To Make Homemade Greek Yogurt! Recipe Substitutions and Variations
How To Make Homemade Greek Yogurt!
Intro
This is the easiest, creamiest Greek yogurt you’ll make at home, honestly. It takes a little time but very little hands-on work, and the flavor is way better than store-bought. Don’t overthink it, just follow the steps and you’ll get thick tangy yogurt that’s perfect for bowls, baking, or just eating with honey.
Ingredients
– 1 quart (4 cups) whole milk, preferably not ultra-pasteurized, it’s richer and makes creamier yogurt
– 2 heaping tablespoons plain yogurt with live active cultures, store-bought or from a previous batch
– 1/4 to 1/3 cup nonfat dry milk powder, optional, for a thicker creamier Greek texture
– Pinch of fine salt, optional, to brighten the flavor
– Optional sweetener: 1 to 2 tablespoons honey or maple syrup, or 1 teaspoon vanilla extract, if you want it flavored
Equipment
– Heavy pot, candy or instant-read thermometer, whisk, bowl, warm place to incubate (oven with light on, cooler with warm water, yogurt maker), fine mesh strainer or cheesecloth, large bowl to catch whey.
Method
1. Heat the milk: Pour the milk into a heavy pot and slowly heat to 180°F (82°C). Stir occasionally so the milk doesn’t scorch, you want tiny bubbles and some steam. Heating helps change the proteins so the yogurt sets nicely.
2. Cool the milk: Remove from heat and let the milk cool to 110–115°F (43–46°C). You can speed it by setting the pot in a sink of cool water, but keep stirring gently so it cools evenly.
3. Temper the starter: Put your 2 heaping tablespoons yogurt in a small bowl. Add a few tablespoons of the warm milk, whisk smooth, then stir that back into the pot. This avoids shocking the cultures. If using dry powdered starter follow package directions.
4. Add powder and salt: If you’re using dry milk powder for thickness, whisk it in now so it dissolves. Add a pinch of salt if you like.
5. Incubate: Pour the milk into a clean container, cover, and keep it warm at about 110°F for 6 to 12 hours depending on how tangy you want it. 6 hours = mild, 12 hours = tangier and thicker. Use your oven with just the light on, or a cooler with a warm jar, or a yogurt maker. Don’t jiggle it while it sets.
6. Chill: Once set, refrigerate for at least 4 hours. It firms up more as it cools.
7. Strain to Greek: Line a fine mesh strainer with cheesecloth or a clean kitchen towel, set over a bowl, pour yogurt in and let drain 1 to 4 hours depending on how thick you want it. For super-thick Greek, leave longer. Save the whey for smoothies, baking, or discard.
8. Finish: Stir in sweetener or vanilla if using. Taste and add a pinch more salt if it needs brightening. Store in a sealed jar up to 1 week.
Tips and tricks
– Don’t rush the heating or cooling, those temps matter for good texture.
– If your starter was old or not active, your yogurt might be runny, so always use fresh yogurt with live cultures.
– Want richer yogurt: add 1/3 cup heavy cream to the milk before heating. It makes it almost like dessert.
– For tangier yogurt, let it incubate longer, but don’t go above 12–14 hours or flavors get weird.
– Strain time controls thickness: 1 hour = creamy, 3+ hours = spoonable Greek.
Substitutions
- Whole milk: use 2% or a mix of 3 cups whole milk plus 1 cup heavy cream for extra richness, or try lactose-free whole milk; expect slight texture differences.
- Plain yogurt starter: swap with 2 tablespoons buttermilk or kefir (live cultures), or use a powdered yogurt starter following package amounts.
- Nonfat dry milk powder: replace with 1/3 cup heavy cream to enrich and thicken, or add 1 tablespoon cornstarch dissolved in a little milk before heating for body.
- Honey/maple/vanilla: substitute agave syrup, simple syrup, or 1 teaspoon lemon zest for bright flavor instead of added sweetener.
Go make some, it’s so worth it. Bowl it with fruit, nuts, a drizzle of honey and enjoy.
Pro Tips
– Use whole milk that is not ultra pasteurized if you can, it makes a noticeably creamier yogurt. If you want Greek style without a ton of straining, stir in a few tablespoons of nonfat dry milk when heating the milk, it boosts solids so you get thickness faster.
– Don’t add the starter to piping hot milk, or the cultures will die. Temper the starter with a little warm milk first and keep incubation temps around that warm-bath feeling; also try not to stir too much once it’s incubating or you’ll knock the set back.
– Keep the incubating jar somewhere that stays steady and warm for 6 to 12 hours, not fluctuating temps. An oven with the light on, an insulated cooler, or a yogurt maker works; if it’s too cool the yogurt stays runny, too hot and it tastes overly sharp.
– Save the whey when you strain it. It’s great in smoothies, bread dough, or for fermenting veggies, and using 2 tablespoons of fresh yogurt from a good batch as your next starter will keep your culture alive longer.
How To Make Homemade Greek Yogurt! Recipe
My favorite How To Make Homemade Greek Yogurt! Recipe
Equipment Needed:
1. Heavy bottomed saucepan (at least 1 quart)
2. Instant read thermometer
3. Whisk
4. Small bowl for tempering the starter
5. Measuring cups and measuring spoons
6. Clean jars or container with lids or a towel for covering
7. Fine mesh sieve
8. Cheesecloth, coffee filter, or a clean kitchen towel for lining the sieve
9. Large bowl to catch whey and a ladle or large spoon for transferring
Ingredients:
- 1 quart (4 cups) whole milk, preferably not ultra-pasteurized, it’s richer and makes creamier yogurt
- 2 heaping tablespoons plain yogurt with live active cultures, store-bought or from a previous batch
- 1/4 to 1/3 cup nonfat dry milk powder, optional, for a thicker creamier Greek texture
- Pinch of fine salt, optional, to brighten the flavor
- Optional sweetener: 1 to 2 tablespoons honey or maple syrup, or 1 teaspoon vanilla extract, if you want it flavored
Instructions:
1. Pour 1 quart whole milk into a heavy saucepan, whisk in 1/4 to 1/3 cup nonfat dry milk powder if you want thicker creamier Greek yogurt, and slowly heat to about 180 degrees F while stirring occasionally so it doesnt scorch or form a big skin.
2. Remove from heat and let the milk cool to about 110 to 115 degrees F; use a thermometer if you got one, if not it should feel warm on your wrist like a hot bath but not burning.
3. Scoop 2 heaping tablespoons plain yogurt with live active cultures into a small bowl, temper it with a few tablespoons of the warm milk so it relaxes, then whisk that back into the pot of milk until combined.
4. Pour the milk into a clean container or jars, cover loosely with lid or a towel and keep it warm and undisturbed for 6 to 12 hours until it sets — longer gives tangier thicker yogurt; good warm methods are an oven with the light on, an insulated cooler with warm water, or a yogurt maker.
5. When it looks set and jiggly, put it in the fridge for a couple hours to chill and firm up; chilling also helps separate whey when you strain.
6. Line a fine mesh sieve with cheesecloth, coffee filter or a clean kitchen towel, set it over a bowl and pour the yogurt in to strain for 2 to 4 hours or overnight for very thick Greek texture; save the whey for baking or smoothies, dont throw it away.
7. Transfer strained yogurt to a container and stir to desired consistency; add a pinch of fine salt to brighten the flavor, and sweeten if you like with 1 to 2 tablespoons honey or maple syrup or 1 teaspoon vanilla extract — you can mix these in now.
8. Keep about 2 tablespoons of this batch as starter for your next batch if you want, store the yogurt in the fridge and use clean spoons so it lasts longer.
9. Quick tips and hacks: use milk that is preferably not ultra pasteurized for a creamier result, adding more dry milk powder makes it thicker without extra straining, dont over stir or youll knock out the cultures, and if your yogurt is too tart shorten the incubation next time or pick a milder store bought starter.