I make yogurt in the Instant Pot so easily and budget friendly that if your family eats yogurt like there’s no tomorrow you’ll want to Make Greek Yogurt at home for thicker, healthier batches than store-bought.

I never thought I’d be the kind of person who makes yogurt, but after experimenting with whole milk and plain yogurt with live active cultures as a starter, I’m obsessed. This Instant Pot Yogurt is noticeably thicker and more delicious than store-bought, and the fact it’s an Insta Pot Yogurt Recipe Easy blew my mind.
I botched the first try, forgot to wait, tasted sour and learned quick fixes that actually work, so don’t freak out if your first batch is weird. If your family eats yogurt like theres no tomorrow, you might wish you started making your own sooner.
Ingredients
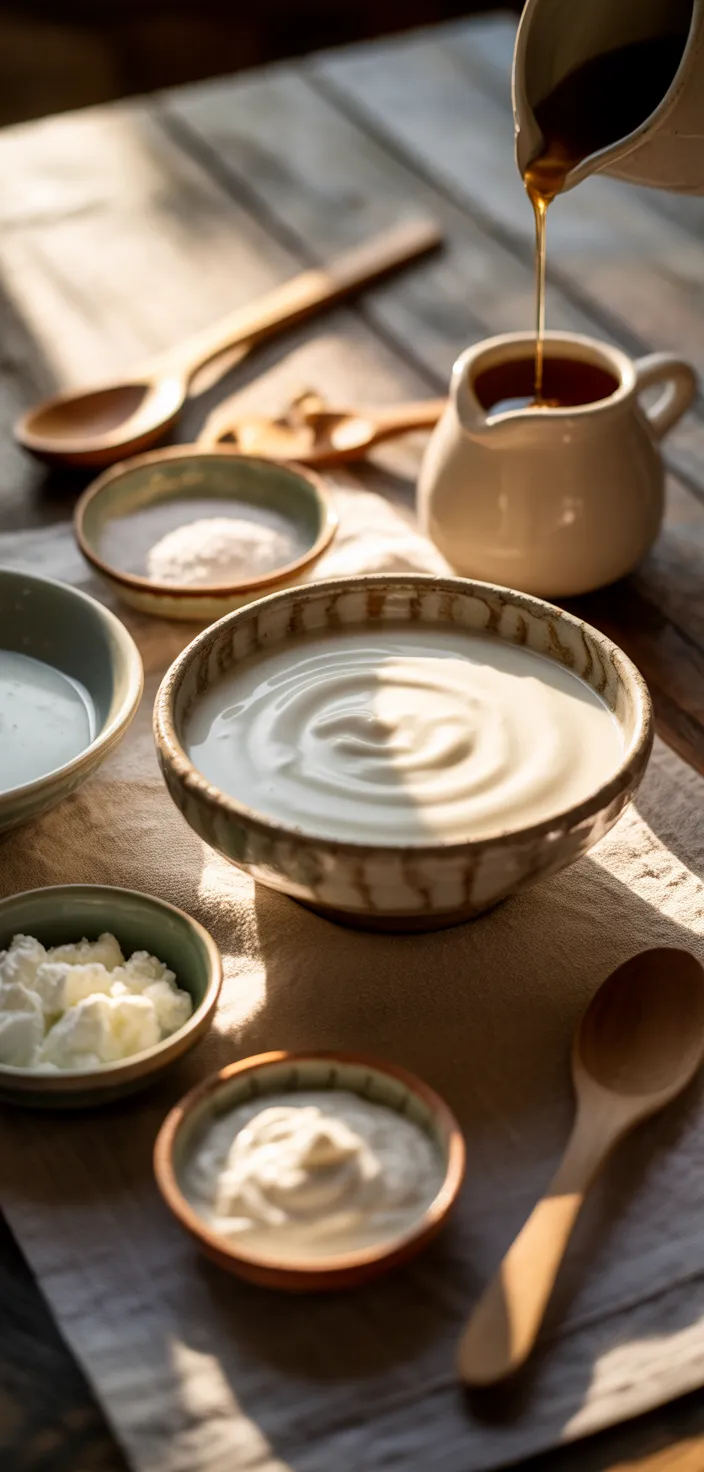
- Whole milk: Rich body and silky texture more fat helps creamy adds calories
- Plain yogurt starter: Live cultures ferment lactose into tangy yogurt gives protein and probiotics
- Nonfat dry milk powder: Boosts protein thickens final yogurt helps set without extra cream
- Heavy cream: Optional for ultra creamy mouthfeel adds fat and decadence not necessary
- Pinch fine salt: Small salt brightens flavor balances tang and enhances sweetness
- Honey or maple syrup: Natural sweeteners add sugars so it’s sweeter with subtle flavor notes
Ingredient Quantities
- 1/2 gallon (about 8 cups / 64 fl oz) whole milk
- 2 tablespoons plain yogurt with live active cultures for starter not flavored
- 1/3 cup nonfat dry milk powder (optional, helps thickening)
- 1/4 cup heavy cream (optional, for extra creamy texture)
- Pinch fine salt (optional)
- Honey or maple syrup to taste (optional)
How to Make this
1. Clean everything good first — inner pot, whisk, spoon, jars — bacteria will mess with your yogurt so rinse or run them through the dishwasher.
2. Pour the 1/2 gallon whole milk into the Instant Pot inner pot, whisk in the 1/3 cup nonfat dry milk powder (this helps thicken), and set the pot to the Yogurt function on BOIL or heat the milk to 180°F (use an instant read thermometer), stirring so it doesnt scorch. Hold near 180°F for a few minutes to help denature proteins.
3. Turn the pot off and cool the milk to 110 to 115°F. Speed it up by setting the pot in an ice bath or removing the inner pot to a cool surface; the temp is important so you dont kill the cultures.
4. While it cools, take 2 tablespoons plain yogurt with live cultures and put it in a small bowl; add a few tablespoons of the warm milk to it and mix smooth (tempering), then whisk that starter back into the cooled milk. If you want extra creaminess stir in the 1/4 cup heavy cream now, and add a pinch of fine salt if using.
5. Put the inner pot back in the Instant Pot, cover with the lid (vent position doesnt matter for yogurt) and press Yogurt; set incubation for 8 to 12 hours (8 gives milder yogurt, 12 gives tangier and firmer). Don’t open the lid while it cultures. If your kitchen is cold wrap the pot in a towel for extra insulation.
6. After incubation check the set with a spoon — it should look custardy and jiggle slightly. Move the inner pot to the fridge and chill at least 2 to 4 hours to firm it up and stop the cultures.
7. For Greek-style thick yogurt, line a colander with cheesecloth or a heavy coffee filter, pour the chilled yogurt in and let it drain in the fridge 1 to 4 hours until you get the thickness you want; longer draining = thicker yogurt. Save the whey for smoothies, baking or soups.
8. Transfer strained yogurt to containers, sweeten to taste with honey or maple syrup and stir in a little reserved heavy cream if you want it extra silky. Taste and adjust salt if used.
9. Store homemade Greek yogurt in the fridge up to 1 to 2 weeks. Use fresh plain yogurt with active cultures as starter next time or keep a few tablespoons from a batch to seed the next batch.
10. If your yogurt didnt set well, you can reheat to 115°F, add another tablespoon or two of active yogurt as starter and incubate again; always keep utensils super clean, use a thermometer for temps, and avoid flavored yogurt as a starter.
Equipment Needed
1. Instant Pot with a Yogurt function, or a heavy saucepan if you dont have one
2. Instant read thermometer to hit 180°F and cool to 110–115°F
3. Whisk for blending milk and dry milk powder and for stirring in the starter
4. Heatproof spoon or silicone spatula to stir and check for scorching
5. Small bowl for tempering the starter
6. Large bowl and ice for an ice bath to speed cooling
7. Colander plus cheesecloth or a heavy coffee filter for draining into Greek yogurt
8. Measuring cups and spoons, plus jars or airtight containers for storing the yogurt
FAQ
Easy And Simple Instant Pot Greek Yogurt Recipe Substitutions and Variations
- Whole milk: swap for 2% (yogurt will be a bit thinner) or use skim plus 2 to 3 tbsp nonfat dry milk powder to fake the richness; for dairy free use full‑fat canned coconut milk but you must use a plant‑based starter and expect a coconut flavor.
- Plain yogurt starter: instead of store yogurt, use a powdered yogurt starter or 1 to 2 probiotic capsules that list live cultures (make sure no fillers); or just save 2 tbsp from a previous homemade batch and use that.
- Nonfat dry milk powder: if you don’t have it, use whole milk powder or milk protein concentrate the same amount; no powder at all is fine too, just strain longer for thicker Greek style, or dissolve 1 tsp unflavored gelatin in warm water after cooling to help set.
- Heavy cream: replace with equal parts half and half or 1/4 cup evaporated milk for extra creaminess; you can also skip it if you want lower fat, but the yogurt won’t be as rich.
Pro Tips
– Use a good instant read thermometer and trust it, not your gut. Temps matter more than time so check a few spots in the pot, and if it feels uneven after a few hours you probably had a cold spot. Wrap the pot or set it on a warm surface if your kitchen is cold, dont rely on the display alone.
– Keep a little of each successful batch in the fridge to use as starter next time, but every few months refresh with a new commercial or freeze dried starter so the cultures dont drift and weaken. Flavored or low fat yogurt as starter will give weird results, so stick to plain and fresh.
– For super smooth texture mix the dry milk into a small amount of warm milk first so it dissolves, and strain the chilled yogurt in the fridge using a coffee filter or tight-weave cloth for several hours. If you want it silky, stir in a tablespoon or two of the reserved cream after chilling rather than before incubating.
– Save the whey for smoothies, bread or soup broth and use it within a week. Also if a batch doesnt set well you can reheat gently to about 110 F, add a spoonful of fresh active starter and incubate again instead of tossing it.
Easy And Simple Instant Pot Greek Yogurt Recipe
My favorite Easy And Simple Instant Pot Greek Yogurt Recipe
Equipment Needed:
1. Instant Pot with a Yogurt function, or a heavy saucepan if you dont have one
2. Instant read thermometer to hit 180°F and cool to 110–115°F
3. Whisk for blending milk and dry milk powder and for stirring in the starter
4. Heatproof spoon or silicone spatula to stir and check for scorching
5. Small bowl for tempering the starter
6. Large bowl and ice for an ice bath to speed cooling
7. Colander plus cheesecloth or a heavy coffee filter for draining into Greek yogurt
8. Measuring cups and spoons, plus jars or airtight containers for storing the yogurt
Ingredients:
- 1/2 gallon (about 8 cups / 64 fl oz) whole milk
- 2 tablespoons plain yogurt with live active cultures for starter not flavored
- 1/3 cup nonfat dry milk powder (optional, helps thickening)
- 1/4 cup heavy cream (optional, for extra creamy texture)
- Pinch fine salt (optional)
- Honey or maple syrup to taste (optional)
Instructions:
1. Clean everything good first — inner pot, whisk, spoon, jars — bacteria will mess with your yogurt so rinse or run them through the dishwasher.
2. Pour the 1/2 gallon whole milk into the Instant Pot inner pot, whisk in the 1/3 cup nonfat dry milk powder (this helps thicken), and set the pot to the Yogurt function on BOIL or heat the milk to 180°F (use an instant read thermometer), stirring so it doesnt scorch. Hold near 180°F for a few minutes to help denature proteins.
3. Turn the pot off and cool the milk to 110 to 115°F. Speed it up by setting the pot in an ice bath or removing the inner pot to a cool surface; the temp is important so you dont kill the cultures.
4. While it cools, take 2 tablespoons plain yogurt with live cultures and put it in a small bowl; add a few tablespoons of the warm milk to it and mix smooth (tempering), then whisk that starter back into the cooled milk. If you want extra creaminess stir in the 1/4 cup heavy cream now, and add a pinch of fine salt if using.
5. Put the inner pot back in the Instant Pot, cover with the lid (vent position doesnt matter for yogurt) and press Yogurt; set incubation for 8 to 12 hours (8 gives milder yogurt, 12 gives tangier and firmer). Don’t open the lid while it cultures. If your kitchen is cold wrap the pot in a towel for extra insulation.
6. After incubation check the set with a spoon — it should look custardy and jiggle slightly. Move the inner pot to the fridge and chill at least 2 to 4 hours to firm it up and stop the cultures.
7. For Greek-style thick yogurt, line a colander with cheesecloth or a heavy coffee filter, pour the chilled yogurt in and let it drain in the fridge 1 to 4 hours until you get the thickness you want; longer draining = thicker yogurt. Save the whey for smoothies, baking or soups.
8. Transfer strained yogurt to containers, sweeten to taste with honey or maple syrup and stir in a little reserved heavy cream if you want it extra silky. Taste and adjust salt if used.
9. Store homemade Greek yogurt in the fridge up to 1 to 2 weeks. Use fresh plain yogurt with active cultures as starter next time or keep a few tablespoons from a batch to seed the next batch.
10. If your yogurt didnt set well, you can reheat to 115°F, add another tablespoon or two of active yogurt as starter and incubate again; always keep utensils super clean, use a thermometer for temps, and avoid flavored yogurt as a starter.